Pages

Thursday, December 31, 2015

Xmas Dinner.. Eve & Day

So, after the Xmas gathering, my family and I, just the four of us, had a descent dinner at home on the eve of the Xmas
And I made this easy crispy roast chicken which my family likes including the kids


The kids love tearing the crisp skin apart and eat it just with plain rice. I used carrots and corn to roast together with the chicken, as these are vegetables they love the most


I just estimated the recipe...
 
What you need:
 
1 free range chicken, discard the head and feet and all the extra fats. Keep skin intact
juice of a large lime
salt, black pepper, butter
carrots - peeled and chopped
sweet corns - peeled and chopped
1 garlic bulb
 
Method:
  1. Rub chicken all over with lime juice including the cavity, let it stand for about 15mins and then rinse well, pat dry with kitchen towel
  2. In a bowl mix salt, and black pepper. Rub chicken with butter all over and continue with rubbing it with salt/pepper mixture. Refrigerate uncovered for a few hours
  3. Before roasting, preheat oven to 200degC
  4. Take the chicken out of the fridge and fill up its cavity with garlic bulb and the chopped carrots
  5. While waiting, prepare a baking dish enough to fit the chicken plus all veggies
  6. Rub the cut veggies with butter all over and place them in the dish
  7. Place the chicken at the centre over the veggies and roast for about 20mins
  8. Remove the dish from the oven and check on the veggies (at this point the chicken will not be browned yet). If the carrots have softened and the corns are cooked, remove them from the dish and transfer to a serving plate (if not you may continue roasting for about 10 more mins)
  9. Put the baking dish with the chicken back into the oven and continue to roast until the chicken turned golden brown (mine was about 75mins - it depends on the size of the chicken)
  10. Once cooked, remove from oven and transfer to carving board. Let it stand for about 15mins before carving (I didn't do this step as my family likes to rip it off by hand LOL)
 
We love this birdie. The skin was so crispy and tasty. The meat was still juicy. The roasted carrots and garlic were really good as well as the corns, cooked to perfection. Yum!


The next day on Xmas day, my sis & her DH came over for the usual Xmas dinner and gift exchange time. This time I cooked chicken cordon bleu, avocado mango salsa and scalloped potatoes au gratin and I also baked light fruits cake. My sis and her DH brought their homemade Dutch bitterballen which I always love :)


So here's the recipes I used for my cooking that day...


For the Cordon Bleu, I adapted from Emeril Lagasse

What you need:

4 boneless and skinless chicken breast
salt and black pepper
4 slices ham (I used honey baked)
4 slices Swiss cheese
1 cup all purpose flour
2 large eggs
2 tbsp. fresh milk
1 cup breadcrumbs
1 tsp garlic salt
some cooking oil

Method:
  1. Place chicken breast on a cutting board, layer a clingwrap over it and pound til evenly flattened
  2. Remove the clingwrap, rub salt and pepper over it and place ham on one side of the chicken followed by cheese on top of the ham. Fold the other side of the skin over to the other side so it'll cover the ham and cheese slice
  3. Press lightly to flatten and seal the edges, making sure the ham and cheese tucked securely inside the chicken
  4. Pour flour on a plate. Mix together egg and milk, whisk in a bowl. And pour breadcrumbs on another plate and mix in garlic salt
  5. Heat cooking oil in a
  6. Put stuffed chicken breast on the flour, coat evenly. Transfer to the egg mixture bowl, making sure it's dipped thoroughly and then next to the breadcrumbs mixture, coat evenly
  7. Do the same to the rest of the chicken and keep in the refrigerator for about 30mins
  8. Heat oil in a non stick skillet over medium heat
  9. Place the chicken slowly, top with 1/2 tbsp butter, be careful not to overcrowd the skillet. Fry til golden brown at the bottom about 4 to 5mins. Flip to the other side and put another 1/2 tbsp butter over it and fry for another 4 to 5mins til the chicken is evenly browned and cooked through
  10. Serve immediately while it's hot with Parmesan Dijon mustard cream sauce (recipe below)

Recipe for Parmesan Dijon mustard cream sauce...
Source: Mel's Kitchen

What you need:

2 tbsp butter
2 tbsp all purpose flour
1 cup milk
1 tsp chicken stock powder
1/2 tsp salt
1 tbsp Dijon mustard
1/2 tsp Worchestershire sauce
1/2 cup finely grated Parmesan cheese

Method:
  1. Melt butter. Stir in flour, whisking constantly, cook for 1-2 minutes
  2. Slowly pour in milk while whisking quickly. Stir in chicken stock powder and salt. Whisk constantly over medium heat until the mixture begins to simmer and thicken, about 3-5 minutes
  3. Once it has bubbled and thickened, remove from heat and stir in mustard, worcestershire sauce and parmesan cheese. Stir until cheese is melted. Serve warm over the chicken

***I made a mistake on that day, thanks to my ignorance not reading the recipe thoroughly first. Instead of using one chicken breast for one cordon bleu, I used two! So I put the ham and cheese on the chicken breast and then I put another slice of chicken breast over it. I ended up with giant and thick pieces of chicken cordon bleu! After frying them, I found that the centre part wasn't fully cooked so I cut them into two and place them on a slightly buttered baking sheet, and baked them til cooked, about 200degC for 20mins. I couldn't get the cheese oozing out because of this :(
Well, I will give this a try the right way next time and update here...


Next dish is Scalloped Potatoes Au Gratin
Yummy cheesy and creamy, a great companion to the chicken dish
Source: Ellie Krieger


What you need:

1 1/2 kg potatoes, rinse well and slice into 1/8" thick
750ml cold skimmed milk
1/4 cup unbleached all purpose flour
2 cloves of garlic, minced
a little dried thyme
1 3/4 cup grated Swiss cheese
1 1/2 tsp salt

Method:
  1. Preheat oven to 180degC. Grease a rectangle baking dish (I used 20x30x5cm)
  2. Boil potato slices til just tender. Drain and let slightly cool
  3. Put milk and flour in a saucepan and whisk til the flour dissolved. Add in garlic and thyme, heat over medium fire and stir to a boil and is thickened. Remove from heat, stir in salt and 1 cup of the cheese until melted
  4. Arrange half of the boiled potato slices in the baking dish. Pour half of the cheese sauce over it. Arrange the remaining potatoes and lastly pour the remaining sauce. Sprinkle with the remaining cheese
  5. Bake for about 25mins til bubbling. Change oven to broil function and broil til the top is evenly browned, about a few minutes. Serve immediately

Now the last dish for the main meal is the refreshing avocado mango salsa


This is the second time I made this and I still enjoyed it a lot
Recipe can be found HERE


The quantity doesn't look much but I was really stuffed. Yum yum...


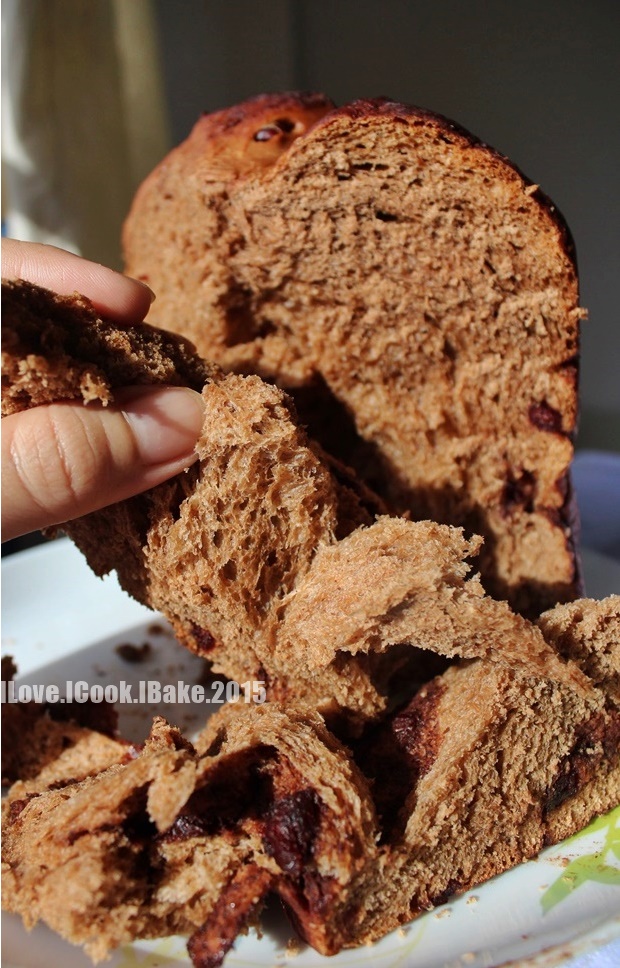
 As for the light fruits cake, I used recipe from Kenneth Goh of Guai Shu Shu


Fresh from the oven


This impatient me cut the cake while it's still quite warm, hence the messy cut :)


What you need:
 
250g butter, room temperature
250g mixed dried fruits (I used dried cranberries and golden raisins)
250g castor sugar
150g self raising flour
100g unbleached all purpose flour
4 eggs, lightly beaten
50ml fresh orange juice
1 tsp vanilla essence
 
Method:
  1. Soak mixed dried fruits in orange juice for 15mins. Drain and squeeze excess juice out of the fruits and set aside, also the juice in separate bowls. Mix a little flour with the dried fruits
  2. Preheat oven to 160degC. Grease and line an 8inch square pan
  3. Cream butter and sugar til light and fluffy and light. Add in egg one at a time, beat thoroughly after each addition
  4. Fold in mixed fruits. And then fold in orange juice and flour, doing it alternately start and end with the flour
  5. Pour batter into the prepared pan and bake for about 45mins or until the skewer comes out clean and the top is evenly browned
  6. Cool in the pan for about 10mins and transfer to a cooling rack
 
Sweet, light, soft, and delicious pieces of fruity cake accompanied by Kronenbourg 1664 :)


This post is linked at Cook and Celebrate: Christmas 2015 hosted by Yen from GoodyFoodies, Diana from The Domestic Goddess Wannabe and Zoe from Bake for Happy Kids at here.


***Please pardon the quality of all the pics above, they were quickly taken just with my mobile phone LOL

Tuesday, December 29, 2015

Xmas 2014 - Small Gathering 4The Kids (& The Parents Too)

We had a jolly time on that one evening when my kids together with their friends, which happen to be my kids school mates and my neighbors too, gathered at my place. The kids were busy playing together while we the parents had so much fun catching up (read: gossiping LOL)
The kids had presents under Xmas tree and they happily ripped off all of them in no time, and they didn't even want to wait til after dinner hehe..


Posing with all the Xmas gifts :)


We had potluck for dinner, all the yummy food that made us so stuffed!


I cooked Indonesian style yellow rice, turmeric fried chicken and sambal eggs and I had beef floss sent from Indonesia which goes well with the yellow rice. I also baked fruit pastry cake and Xmas tree brownies with my kids as the decorator :)
One mummy made very yummy ondeh2 (we call it 'klepon' in Indonesian) and also really delicious samosa. Another mummy cooked fried noodles, fried chicken nuggets, made veggies achar and yummy agar2 too. Also my sis came and she cooked delicious begedil (we call it perkedel in Indonesian)

Now I will share all the dishes I cooked and the cakes I baked :)

First, I start with the delicious Indonesian style yellow rice, cooked in rice cooker
It's one yummy and tasty rice which I forgot to take picture of aarrggh! I only had 1 picture which has been mixed with chicken pieces taken with my handphone


Source: Diah Didi

What you need:

500g long grain rice
about 900ml water
11/2 tsp ground turmeric
4 pcs Indonesian bay leaves
4cm blue ginger, peeled and lightly pounded
2 stalks lemongrass, lightly pounded
2 pandan leaves, tied a knot
11/2 tsp salt
6 tbsp instant coconut milk (I used Kara)

Method:
  1. Mix together all ingredients except coconut milk in rice cooker, give a quick stir and let it start cooking
  2. When the cooking process stops (usually when the light switched to "keep warm" mode), quickly pour in coconut milk and stir well. Close back the rice cooker and after about 30mins open up and give a thorough stir, discarding the lemongrass and blue ginger. And it's done :)

Second is turmeric fried chicken. Tasty and tender very well marinated chicken fried til golden brown. It's a must when one eats yellow rice :)


Source: Herti Kitchen
 
What you need:
 
1 free range chicken, cut into pieces
2 pcs Indonesian bay leaves
2 stalks lemongrass, lightly pounded
250ml coconut water mixed with 100ml water (original recipe used 250ml water)
cooking oil for frying
1 large lime to pre wash the chicken
 
Blend together:
5 candlenuts
1 tsp ground coriander
8 cloves of garlic
1 tsp ground turmeric
4cm blue ginger, peeled and sliced
4cm old ginger, peeled and sliced
11/2 tsp salt
 
Method:
  1. Squeeze large lime over the chicken and let it stand for about 15mins. Rinse
  2. Slather the blended spices all over the chicken including inside the cavity, cover in cling wrap and keep refrigerated for a minimum of 2 hours
  3. In a large wok, pour coconut water mixture, together with bay leaves, lemongrass. Bring to boil and then add in chicken. Let it cook til the liquid is much lesser and thickened
  4. In another wok, heat cooking oil and fry the chicken pieces til golden brown


Third is sambal balado egg. Another must dish to accompany yellow rice. I am not too tolerant to super spicy dish using bird's eye chili so I used all large red chilis and I discarded most of the seeds. Those love super spicy dishes, you may retain all the seeds and/or add bird's eye chili into it


Source: NCC (Natural Cooking Club)

What you need:

10 hard boiled eggs, peeled (original recipe fry the eggs)
400g large red chilis, discard the seeds, cut in chunks and blitz in food processor but not too smooth
120g shallots, peeled and thinly sliced
25g garlic, peeled, halved and blitz in food processor til smooth
1 stalk of lemongrass, lightly pounded
1pc Indonesian bay leaf
1cm blue ginger, lightly pounded
salt, sugar and chicken stock powder (to your preference)
150ml cooking oil

Method:
  1. Heat oil in a wok and sautee shallots til translucent. Add in chilis and garlic and continue to cook til fragrant
  2. Add in lemongrass, bay leaf and blue ginger, stir well and cook for a few mins
  3. Add in salt, sugar  and chicken stock powder, stir well and adjust the taste
  4. Add in eggs, stir well, let boil for a while and remove from heat


So those are the three dishes I cooked. Now is the cake I baked that day. It's actually an old recipe I once tried to make too and my family and I loved it. Fruit pastry cake. You may view it HERE
This cake has been popular lately in some Facebook baking groups. I followed the modified recipe I found there. My apology as I can't remember who did the modification hence no mention here. Anyway, it turned out really good :)


Original recipe is from Happy Home Baking
 
What you need:
 
100g butter
180g caster sugar (reduced to 165g) 
50g low fat yogurt (I used 70g)
30ml fresh orange juice (addition)
3 eggs, lightly beaten, room temperature
1 tsp vanilla extract
1 tsp lemon zest
210g plain flour
1 tsp baking powder
500g fruits (I used canned peach, fresh raspberries and blueberries)
 
Method:
  1. Wash, cut and drain fruits - set aside
  2. Grease with butter the side of a 9" or 8" round pan and line the base with parchment paper
  3. With an electric mixer, cream butter, sugar and yogurt till light and fluffy
  4. Add in the eggs gradually and beat till incorporated in the batter. (the mixture may appear slightly curdled)
  5. Add vanilla extract and zest. Mix to combine
  6. Sieve over flour and baking powder and mix till smooth
  7. Pour batter into prepared pan and smooth out the top with a spatula
  8. Arrange fruits on top, don’t press the fruits down into the batter. Decorate the fruits as desired
  9. Bake in pre-heat oven at 180degC for 60minutes or until a skewer comes out clean when inserted into the cake. Cover the top with foil in the last 15 mins of baking to prevent the top from getting over browned
  10. Leave the cake to cool in the pan for about 5~10 mins
  11. Dust the cake with some icing sugar if desired
 
The last thing I baked was decorated Christmas tree fudgy brownies. Please refer the recipe is HERE
I used 2 brownies pans so that it turned out not so thick. Then I cut into long triangle to Christmas tree shape. After it's completely cooled, I poked each triangle with ice cream stick and let my kids decorating them with whatever I had on hand - with a little help from me :)


This is my favorite :)


So, that's all what I have prepared for the gathering. We all enjoyed it so much and can't wait for another one next year! LOL
 
This post is linked at Cook and Celebrate: Christmas 2015 hosted by Yen from GoodyFoodies, Diana from The Domestic Goddess Wannabe and Zoe from Bake for Happy Kids at here.


***Please pardon the quality of some of the pics above. They were taken using my mobile phone in a rush LOL

Tender Loving Crackle Cookies

I missed out this bake for ABC (Avid Baker's Challenge) in June so when I was looking for cookies recipe I wanted to make for this year's Christmas, I decided to give it a try
And, I wasn't disappointed at all. The cookies were yummy, so fudgy and chocolaty with some crunch on the outside while soft and chewy on the inside. Really good!


And I also find the cracked cookies look pretty :)


Recipe is from Scientifically Sweet

What you need:
(I made double recipe as stated below)

142g unbleached all purpose flour
50g unsweetened Dutch processed cocoa powder (I used Valrhona)
200g brown sugar (original recipe used normal white sugar)
1 tsp baking powder (I used double acting)
1/2 tsp salt
84g cold unsalted butter, cut into small cubes
170g 70% dark chocolate, cut small (original recipe used bittersweet chocolate)
2 large eggs
1 tsp pure vanilla extract
2 cups icing sugar for rolling

Method:
  1. Preheat oven to 190degC. Line baking sheets with parchment paper
  2. Whisk together flour, cocoa powder, brown sugar, baking powder and salt. Pour into food processor and add in cubes of cold butter. Blitz til it resembles breadcrumbs (original recipe used rubbing method by hand which I found more time consuming). Stir in chopped chocolate
  3. Whisk together eggs and vanilla, add into the chocolate mixture and stir with fork til moistened and well combined. Cover with cling wrap and refrigerate for 30mins (mine was more than 1 hour)
  4. Pour icing sugar to a wide plate. Scoop dough (1 heaped tsp each) and drop to them on the icing sugar and roll them until fully covered
  5. Place on the lined baking sheet and bake for about 8mins until set but slightly soft at the centre
  6. Let cool on the baking sheet for a minute and then transfer to cooling rack
  7. Keep in an airtight container when it's completely cooled

My kids love these cookies that 10pcs were gone within a minute after the first batch out from the oven LOL


Every chocolate lover temptation :)


This post is linked at Cook and Celebrate: Christmas 2015 hosted by Yen from GoodyFoodies, Diana from The Domestic Goddess Wannabe and Zoe from Bake for Happy Kids at here.
 

Monday, December 14, 2015

Bake Along #89 Mocha Panettone

I never bake this famous Italian Christmas bread before. This is my first try and instead of doing the traditional kind, I followed Joyce from Kitchen Flavours, baking this yummy mocha panettone
Yes, it's seriously yummy with the texture I always prefer in sweet bread of any kind - soft, fluffy and can last for a few days
This panettone is considered huge for my family to finish in a day, so I managed to see how it was until the third day. In room temperature, the bread stayed soft on the second day. It turned slightly harder on the third day but after microwaving for 15secs, it's back to the original texture.
Very pleased with this recipe. It's a keeper for my family
Like Joyce, I also added chocolate chips and dried cranberries into the bread
One problem when I kneaded the chocolate chips into the dough, it melted rather quickly. So in the end, not all chocolate chips could be mixed and those melted ones were blended into the dough, that's why my bread looked more brownish
No complain though, it still tasted delicious. I just wonder how is the perfect way to mix in the chocolate chips into the dough without making any chips to melt.. Any advice?

I baked this bread in the late afternoon, by the time it's ready it was in the evening already
These pics below were taken in that very evening once the bread was out from the oven


With my 15cm round pan, I got this over 14cm tall bread :)


I like to see the deep cross cut on top - looked great after baked (except for some burnt dried cranberries LOL)


After half an hour on the cooling rack, I had no more patience to tear the bread apart haha...


As usual, I never like taking pic of my bake in the evening, so I took more pics the next morning before I had it for my breakfast. See how different they are, so much more alive, nicer, clearer and appetizing :)


With my morning little angel posing LOL


I love tearing my bread apart and taking pics of it :)


Okay, here is the amazing recipe...
 
What you need:
 
2 tbsp instant coffee powder (I used Nescafe Gold)
2 tbsp hot water
140ml fresh milk
1 egg and 2 egg yolks
400g unbleached white bread flour
1 tbsp unsweetened cocoa powder (I used Hershey's)
1 tsp ground cinnamon
1/2 tsp salt
75g caster sugar
75g butter, softened
1 1/2 tsp dried instant yeast
115g chocolate chips (I used Hershey's)
1/3 cup dried cranberries
melted butter for glazing
 
Method:
  1. In a small bowl, mix coffee powder with hot water til dissolved. Pour into the bread maker pan and add in milk and eggs
  2. Sift bread flour and cocoa powder, and sprinkle over the liquid until it's covered completely. Add in cinnamon, followed by salt, sugar and butter. Place them in different corner of the bread pan. Make a small indent at the center of the flour mixture (not until touching the liquid) and add in yeast
  3. Set the bread machine to "Dough" function. Press start and let the machine do its job (kneading and first proofing about 1hr 30mins)
  4. Grease 6inch round deep pan and line with baking paper, making sure the paper is about 3inch higher than the pan height
  5. When the dough is done in the bread machine, remove it and put on a lightly floured surface. Punch lightly and knead in the chocolate chips and dried cranberries. Shape into a ball and leave for about 5mins covered with lightly oiled cling wrap
  6. Shape again the dough into ball that can fit into the pan. Place it into the base of the pan and cover with lightly oiled cling wrap. Proof in slightly warm place for 45-60mins or until you can see the dough has risen and almost touch the top of the baking paper
  7. Preheat oven to 200degC, brush the top with melted butter and cut a deep cross on top. Bake for 10mins
  8. Reduce the temperature to 180degC and bake for another 30mins until the skewer comes out clean and the bread is evenly browned all over (mine was shielded with aluminum foil after 20mins of baking and I removed 5mins before the baking ended)
  9. Remove from oven and leave it in the pan for about 5mins and transfer to cooling rack. Let cool before slicing (which I couldn't abide haha..)
  10. Store in an airtight container


This post is also linked at Cook and Celebrate: Christmas 2015 hosted by Yen from GoodyFoodies, Diana from The Domestic Goddess Wannabe and Zoe from Bake for Happy Kids at here.

Monday, November 30, 2015

Mango & Avocado Salsa

Easy and so refreshing! I can't stop eating this. Yum yum :)


What you need:

1 avocado, pitted and diced
1/2 mango, peeled and diced
1/2 Japanese cucumber, halved and sliced
10 cherry tomatoes
1 red onion, peeled and diced
a handful of coriander leaves, chopped
juice of half a large lime
salt and black pepper to taste

Method:
  1. In a bowl, put together all ingredients and mix well
  2. Refrigerate before serving


This post is linked to the event Little Thumbs Up (November 2015: Mango) organised by Zoe of Bake for Happy Kids and Mui Mui of My Little Favourite DIY, and hosted by Jozelyn Ng of Spice Up My Kitchen
 

Mango Soft Milk Toast (1 Proof)

I was thinking to try baking bread with mango for Little Thumbs Up this month when I saw Edith of Rumbling Tummy made one and it looked so good I knew I had to try that
And I did yesterday. The result was a satisfying soft bread I could eat on its own. It stayed soft til now. And it's really tasty, too. The mango taste was not so obvious but it did made the bread sweet and fragrant. I added a little chopped dried mango and it just got better

This recipe has been going viral in some Facebook baking groups and after gave it a try I understand why. The texture of this milk bread is soft yet it has volume that makes you really full after eating just one thick slice. it's far from dense, so really pretty amazing
Another thing is the one time proofing. This is really a bonus from the usual long waiting two times proofing bread making process

Last night I took some pics but as you know I hate taking pics at night. But no choice since DH has been bugging me to do it cos he couldn't wait to try LOL


I got a small loaf and I separated each section so that it would cool faster. You can see the top crust was dark brown. Too dark.
I set my oven at 30mins and then I set my alarm clock on my mobile phone, too. When I came to check 30mins later, I saw the top was dark brown, too brown to my liking
I reckoned it's the pan I used, it's smaller than what's recommended. I guess it caused my bread rose high and I didn't check in time to salvage the situation. Another thing was, I didn't switch on the oven fan. I think that  was one of the reason, too. Luckily it's not burnt yet :)


What you need:

250g bread four (I used unbleached)
40g castor sugar
15g full cream milk powder (I used Fernleaf)
3g salt
3g instant yeast
25g butter, softened (I used extra virgin cold pressed coconut oil)
55g egg (1 medium)
60g fresh milk (I used Magnolia oats milk)
50g mango puree
30g chopped dried mango

Method:
  1. Using breadmaker to knead, I pour in room temperature egg, milk, coconut oil and mango puree, followed by flour, sugar, milk powder and salt in one corner. After that at the other corner, add in yeast. Start kneading cycle, usually it's 30mins
  2. After done, transfer the dough to a lightly floured surface, knead a few times and cut into 3 portion
  3. Flatten each dough and roll downwards. Place in a greased and lined baking pan (recommended 20x10x10cm) and bake in preheated oven of 180degC for 40mins (please check after 30mins)
  4. Remove from oven and transfer to the cooling rack. Brush the top with a little butter and let cool
 
This morning I had this for my breakfast and managed to take some pics, too :)


Still soft!


This post is linked to the event Little Thumbs Up (November 2015: Mango) organised by Zoe of Bake for Happy Kids and Mui Mui of My Little Favourite DIY, and hosted by Jozelyn Ng of Spice Up My Kitchen


Friday, November 27, 2015

Mango & Chicken Rice Salad

Ah, it's almost a month since the last time I blogged!
Kids exams, followed by family holiday, and then post holiday blues haha..
Now, I'm back :)

This salad I am going to share today is very refreshing and very filling at the same time
I enjoyed eating this dish, especially knowing that it's rather healthy, too
Bonus, it's easy to prepare :)


Source: Joanna Soh You Tube Channel

What you need:
(serves 2)

1 cup uncooked rice, cooked as instructed, and cooled (leftover rice is good, I used a mixture of red and white rice)
170g chicken breast, cooked as preferred (I seasoned with salt and pepper then pan fried  and shredded)
110g ripe mangoes, diced
140g Japanese cucumber, diced
1 stalk of spring onion, thinly sliced
1 tbsp chopped basil (I used 1 tsp dried basil)
salt and pepper to taste

Dressing:
juice from 1 large lime
1/2 tbsp sesame oil
1/2 tbsp rice vinegar
1/2 tbsp honey

Method:
  1. In a small bowl, mix all ingredients for the dressing, set aside
  2. In a separate large bowl, mix rice, chicken, cucumber, spring onion, basil and mango
  3. Drizzle the dressing over it and toss til evenly mixed
  4. Season with salt and pepper
  5. Best to keep it refrigerated for a few hours til it's chilled before serving


This post is linked to the event Little Thumbs Up (November 2015: Mango) organised by Zoe of Bake for Happy Kids and Mui Mui of My Little Favourite DIY, and hosted by Jozelyn Ng of Spice Up My Kitchen
 

LinkWithin

Related Posts Plugin for WordPress, Blogger...